Build Instructions
Warning
The HERMES git repository is rather big (~5GB) because it also contains the video raw material from the demo videos on youtube located in folder \demo\. For builds on build servers as Hudson or Jenkins, checkout folder \impl\ only.
Prerequisites
For building HERMES, you need to have Apache Maven 3.x installed as a minimum. You can ease building HERMES by facilitating Docker containers, which will require you to have Hyper-V enabled in Windows, too (we dropped support for older Docker relying on VirtualBox).
Setup
You can either setup the required environment for a HERMES build by executing the scripts given in \build\setup\ and start convenience services manually. Peek at \build\setup\01GeneralSetup.ps and 02HermesDockerSetup.ps for more details. Other than that, you can install Apache Maven, and Docker (for Windows / Mac) yourself, in case not already present and pull docker images for SonarQube etc. Note that the docker images for MySQL, Rexster Server, Elasticsearch, and Jenkins are optional. Further, Nexus OSS is optional but mind the additional plug-ins you need to install to make Nexus suitable for Eclipse artefacts.
Build Server Build
You can build HERMES on a build server, e.g., Jenkins by checking out our git repository from \impl\ on. Alternatively, you can clone it completely and use the pom.xml as provided in \impl\pom.xml. Just overwrite the file in the root folder. The general Maven goals are documented in \build\build.logged.ps1. Note that there are some compulsory maven profiles.
After successfully building HERMES, the build artifacts can be found as follows. The P2 Updateseite is located in \impl\hermes\releng\de.rwth.swc.hermes-updatesite\target\repository. The Demo IDE resides in \impl\hermes\releng\de.rwth.swc.hermes.product\target\products\HERMES and the HERMES SDK is in \impl\hermes\releng\de.rwth.swc.hermes.product.sdk\target\products\HERMES-SDK. Note that the parent-pom configures the platforms you are building for (see below).
Local Windows PowerShell Build
You can build HERMES locally by (in Windows Powershell run as Administrator) performing the subsequent steps. First, (1) start the required environment via "boot.bat" from the root folder. This will start a docker environment and containers as needed for the build, e.g., Jenkins, SonarQube, and so on. Second, (2) initiate the build via "build.bat" in the root folder. This can be all you need to to in case you do not want to have SonarQube results. Third, (3) stop the environment via "halt.bat" in the root folder to halt all the fired up docker containers and the docker environment. Finally, (4) check build artefacts as explained above / below. Note that the entire build is logged in \build\logs\. You may also inspect the details of the above mentioned scripts by looking at the detailed scripts they start in the \build\ directory.
Details on Local PowerShell Build: For simplicity reasons and to keep the git repository clean from unwanted artefacts, the build scripts work as follows. Starting a build copies the \impl\ directory to ..\_build_target\ and starts the build in there. Feel free to drop the entire folder if something went wrong. But keep in mind, that, whatever build, test, logging, or measuring artefacts you are looking for, have a look there and not in the folder of the git repository, i.e., the folder you started the build with "build.bat". Again, we do so to prevent accidentally checked in data which actually does not belong in our git repository.
After successfully building HERMES, the build artefacts can be found as follows (not the difference to above is ..\_build_target\). The P2 Updateseite is located in \_build_target\impl\hermes\releng\de.rwth.swc.hermes-updatesite\target\repository. The Demo IDE resides in ..\_build_target\impl\hermes\releng\de.rwth.swc.hermes.product\target\products\HERMES and the HERMES SDK is in ..\_build_target\impl\hermes\releng\de.rwth.swc.hermes.product.sdk\target\products\HERMES-SDK. Note that the parent-pom configures the platforms zou are building for (see below).
General Remarks
Regarding the git structure, it adheres the common Eclipse repository structure. This means, the folders \impl\hermes.XXX.YYY\ can be seen as components which often contain Eclipse features. Further, the folders \impl\hermes.XXX.YYY.ZZZ\ can be seen as sub-components, which are usually Eclipse features and Eclipse plug-ins. Note that no Eclipse plug-in, with few exceptions, is included in Eclipse products or P2 Updatesites other than by an Eclipse feature. Finally, the maximum depth of the directory structure to Eclipse features and plug-ins is equal. Therefore, the relative directories in all the pom.xml work, e.g., for referring to the parent-pom.
The release engineering files are all grouped in \impl\hermes\releng and we mention the distinguishing parts of the folder names from here on. So, there you can find the Maven "hermes.aggregator" pointing to other parts, i.e., \impl\hermes.XXX.YYY\. Slightly different to that, the Maven "hermes.aggregator.tests" summarizes all Eclipse test fragments directly! The Maven "hermes.parents" contain the one basic parent-pom for configuring Maven and Tycho, e.g., the P2 Updatesites used, which platforms to build for, and so on. Further, "hermes.releng" comprises Eclipse launch configuration for products, Eclipse launch configurations for tests (SWTBot, JUnitPlugin, or JUnit), team project sets, versioning scripts, and external Updatesites. Finally, the build artefact folders, i.e., Eclipse product plug-ins are found here, e.g., "hermes.product" for the Demo IDE, "hermes.product.sdk" for the HERMES SDK. In addition to that, the HERMES P2 Updatesite resides in "hermes-updatesite".
As some further advise, we highly recommend to turn of virus scanners for local builds as soon as you trust us as a source. This will decrease build time tremendously. Further, set up a Nexus Repository Manager OSS to minimize internet access and increase download performance. Note that you need Nexus to have installed plug-ins named "nexus-p2-repository", "nexus-p2-bridge", and "nexus-unpack-plugin". Maybe, you would also like your Maven to use a proxy server, but keep in mind that you need to redrirect traffic to make proper use of your Nexus. Other than that, it seems necessary to do local builds as an Administrator, i.e., starting "build.bat". Finally, you often do not need to run "maven clean install" as it is done in /build/build.logged.ps. We do so, because SonarQube needs that. If you do not intend to use SonarQube, change this line to "mvn clean package" or "mvn clean verify" if you intend to run the tests as well.
-
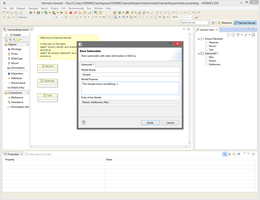
This video shows the basic functionality how models can be stored into a model library. The process takes "known" parts into account and links them to the newly stored.
-
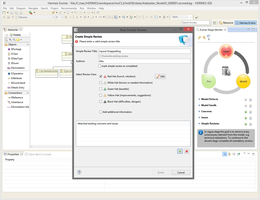
This video shows how the evolution approach assesses model quality and offers a staged approach that guides model quality.
-
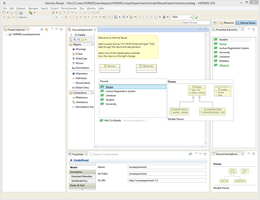
This video shows how models can be "applied", i.e., reused. They are loaded from a model library and inserted into the open editor. Several libraries and several editors are supported.


